Concept
I have always been interested in alternative energy. I helped build a house out in New Mexico in 1995 and met some pretty interesting people in the mountains. Some families lived literally miles from power, so they all had to make due in a variety of ways. This crystalized my interest in developing alternative energy solutions. The protacabin was conceved to be a test bed for all this technology.
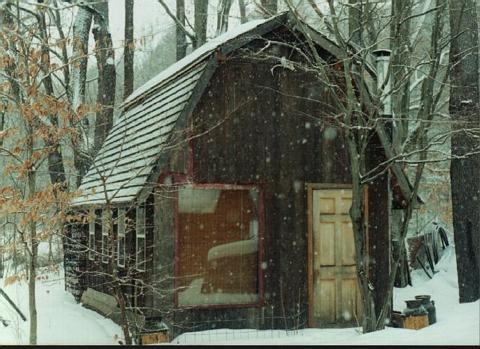
This is my little portacabin. It was built in the summer of 1994. The two halves of the lower portion were built inside the barn at the family farm. These were then moved to a fabrication sight located behind the barn and assembled. The roof was constructed in place and all the finish and trim work was completed. We moved it to another the location that is shown in the picture during the Fourth of July weekend in 1995.
Moving the portacabin
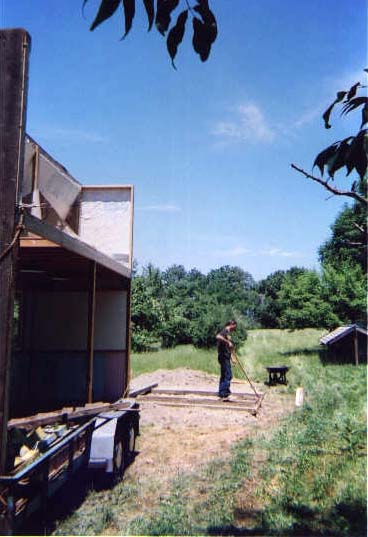 Recently, we moved it to a new location that is closer to its "permanent"
home. The three pictures that follow show the reassembly procedure. First, we prepared
a foundation by setting 4x6 pressure treated beams lengthwise onto an evenly graded and compacted
bed of gravel. These are spaced on 4 foot centers and a 2x6 is nailed
along the ends on each side to stabilize them. Additional gravel is added in the
rectanglular areas formed by the beams and end plates to hold them in place when the
cabin is slid over them. This material is also compacted into place leaving the
top inch of the beams protruding above the fill.
Recently, we moved it to a new location that is closer to its "permanent"
home. The three pictures that follow show the reassembly procedure. First, we prepared
a foundation by setting 4x6 pressure treated beams lengthwise onto an evenly graded and compacted
bed of gravel. These are spaced on 4 foot centers and a 2x6 is nailed
along the ends on each side to stabilize them. Additional gravel is added in the
rectanglular areas formed by the beams and end plates to hold them in place when the
cabin is slid over them. This material is also compacted into place leaving the
top inch of the beams protruding above the fill.
Each half of the cabin is then moved to the site with a trailer and slid off the trailer and slid into place on the foundation. Once the haves are aligned and centered on the foundation, they are joined together with bolts around the perimeter of the joint. Since the cabin is about 11' 6" wide, there is room left on both sides to nail a 12' long 2 x 4 to the tops of the beams. These rails keep the cabin from shifting or sliding off in a wind storm.
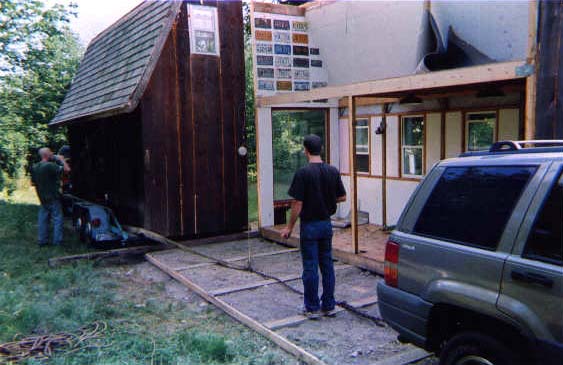 After the halves are joined together, the roof peak is lifted onto the top and
slid into place. The roof on the peak overhangs the steep roof on the
sides and forms an tight seal. I created a crane that fits onto the
trailer to accomplish this tricky procedure.
After the halves are joined together, the roof peak is lifted onto the top and
slid into place. The roof on the peak overhangs the steep roof on the
sides and forms an tight seal. I created a crane that fits onto the
trailer to accomplish this tricky procedure.
The entire move was done over the Fourth of July weekend in 2005 using a 3/4 ton
pickup truck; a flatbed landscaping trailer; some winches, ropes and straps; and three able bodied friends. It would not have been possible
without the help of my best friends Chris Chojnacki and
Gregg Verbeck.
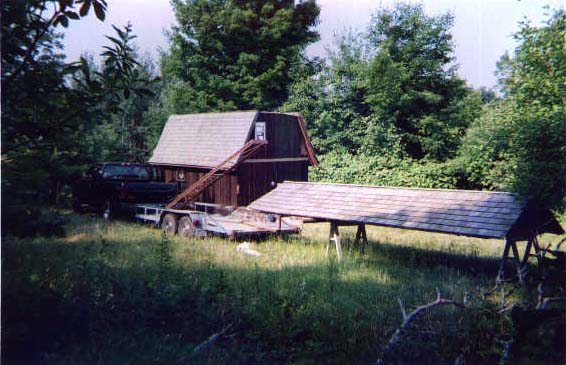 After the two halves are joined, the roof is ready to be put in place. We put the winching boom back
onto the trailer and move it into position to pick up the roof. Once the roof is loaded on the trailer
and moved into position centered on the front of the cabin, the end is tilted up using the winch. We
back up the trailer a little so the elevated end is resting on the top of the cabin. Then, the winch
cable is
moved to the other end of the roof section. That end is raised up until the
roof peak is level. Then, it is slid into place and secured from the
inside.
After the two halves are joined, the roof is ready to be put in place. We put the winching boom back
onto the trailer and move it into position to pick up the roof. Once the roof is loaded on the trailer
and moved into position centered on the front of the cabin, the end is tilted up using the winch. We
back up the trailer a little so the elevated end is resting on the top of the cabin. Then, the winch
cable is
moved to the other end of the roof section. That end is raised up until the
roof peak is level. Then, it is slid into place and secured from the
inside.
There is still one more move left to put the portacabin in its' final home.
The Cabin's New Home
 When I got out of the military in 1991, there was a
strong personal desire to have a home. I'd moved nearly every year and had
no anchor on the Earth. That lifestyle gives you a lot of personal
freedom, but also wears on your soul. Since I didn't have any land, a
portable structure seemed to bridge the gap between the concept of personal
freedom and home. My aunt promised me a plot of land on the family farm
after graduating from college. I picked out a nice spot on the side of a
hill overlooking the valley and went to work building a foundation.
Getting the cabin up off the ground would help insulate the floor and provide
some additional storage in the crawlspace. After carving out a flat area
to build on, the foundation began to take shape.
When I got out of the military in 1991, there was a
strong personal desire to have a home. I'd moved nearly every year and had
no anchor on the Earth. That lifestyle gives you a lot of personal
freedom, but also wears on your soul. Since I didn't have any land, a
portable structure seemed to bridge the gap between the concept of personal
freedom and home. My aunt promised me a plot of land on the family farm
after graduating from college. I picked out a nice spot on the side of a
hill overlooking the valley and went to work building a foundation.
Getting the cabin up off the ground would help insulate the floor and provide
some additional storage in the crawlspace. After carving out a flat area
to build on, the foundation began to take shape.
 About 1995, College wasn't going so well and the whole project seemed like it
was for nothing. Then I laid beams across the foundation, covered it with
corrugated metal panels, then plastic from a pool liner, and covered the whole
thing with a layer of dirt and vegetation. After nearly a decade of moving
around the country, I came back to finish college. Completing my degree in
Mechanical Engineering turned out to be the hardest
thing I've ever done and the land was my carrot in the darkest hours.
Weekends and vacations gave me time to work on the land. The foundation
had suffered from the years of neglect. The downhill wall had heaved from
freezing and thawing. I had to jack the "roof" up off it and pull it
straight again. Once everything was plumb, I created a reinforced concrete
header beam all the way around the foundation. This raised the wall about
a foot and I decided "what the heck, let's make it into a basement" so a couple
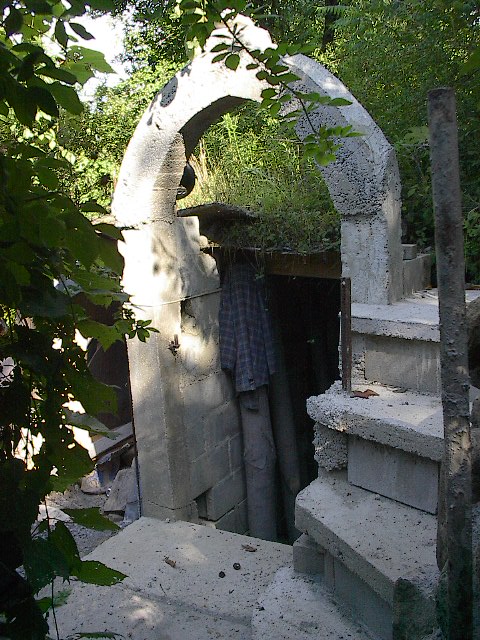
more courses of block were added above the concrete header beam. There are
a couple of steps going down into the basement at the corner of the foundation.
Since the end of the downhill wall was completely unsupported, I decided to make
an arch across the entrance. This is well reinforced with steel and does a
good job of supporting the downhill wall.
About 1995, College wasn't going so well and the whole project seemed like it
was for nothing. Then I laid beams across the foundation, covered it with
corrugated metal panels, then plastic from a pool liner, and covered the whole
thing with a layer of dirt and vegetation. After nearly a decade of moving
around the country, I came back to finish college. Completing my degree in
Mechanical Engineering turned out to be the hardest
thing I've ever done and the land was my carrot in the darkest hours.
Weekends and vacations gave me time to work on the land. The foundation
had suffered from the years of neglect. The downhill wall had heaved from
freezing and thawing. I had to jack the "roof" up off it and pull it
straight again. Once everything was plumb, I created a reinforced concrete
header beam all the way around the foundation. This raised the wall about
a foot and I decided "what the heck, let's make it into a basement" so a couple
more courses of block were added above the concrete header beam. There are
a couple of steps going down into the basement at the corner of the foundation.
Since the end of the downhill wall was completely unsupported, I decided to make
an arch across the entrance. This is well reinforced with steel and does a
good job of supporting the downhill wall.
Once this was complete, I began to fill in on the uphill side and create a terraced retaining wall to provide an area for the trailer to park for loading the cabin onto the foundation. I can put the half that faces downhill onto the foundation first, then slide it into place. The other half can be slid in next to it and bolted together. Since the roof peak section is symmetrical and needs to be raised using a crane that fits on the trailer, I can do that piece from the other side since there is more room to maneuver.
 There is a nice spring at the top of the hill near
the foundation. Water runs from the spring all year and it forms a small
creek that has cut a gorge down the hill just past the building site. My
plan was to harness the water for drinking and hydropower. I purchased
1,000 feet of SDR-21 3" slip joint pipe and rented a trenching machine. It
took 18 straight hours of operation to get the pipe in the ground and the
machine really took some abuse in the process. Since there is about 200
feet of vertical elevation between the inlet and outlet of the pipe, the static
pressure at the bottom is nearly 100 PSI. For electric power generation, a
pelton wheel turbine should do quite well.
There is a nice spring at the top of the hill near
the foundation. Water runs from the spring all year and it forms a small
creek that has cut a gorge down the hill just past the building site. My
plan was to harness the water for drinking and hydropower. I purchased
1,000 feet of SDR-21 3" slip joint pipe and rented a trenching machine. It
took 18 straight hours of operation to get the pipe in the ground and the
machine really took some abuse in the process. Since there is about 200
feet of vertical elevation between the inlet and outlet of the pipe, the static
pressure at the bottom is nearly 100 PSI. For electric power generation, a
pelton wheel turbine should do quite well.
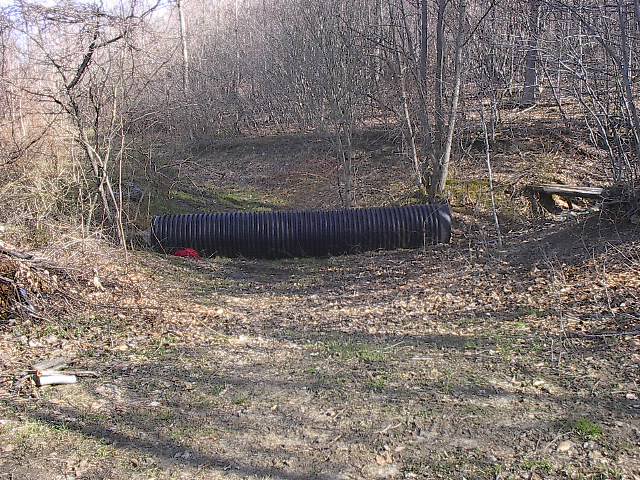
 Another significant obstacle is crossing this creek to
get the cabin to the foundation using my easement. Originally, the farmer
that owned the land just scraped a crossing down to the bedrock and would ford
the creek. Unfortunately, this is too steep to get the trailer across.
I decided to install a culvert pipe across this area. An old friend, Edgar Hauber
warned me that flash floods have come raging down the ravine in the past
and he worried that a culvert would get washed out. In fact, while I was
living in Oregon, one of these came through and cut away part of the original
ford. I filled this with rock and laid the culvert on the ground and began
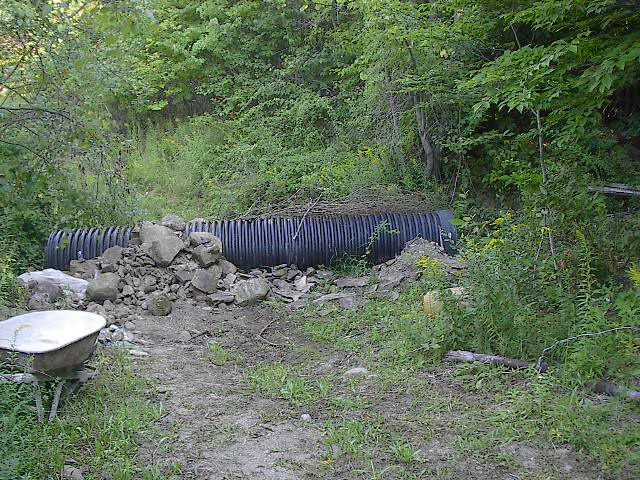
building up around it with rock and fill. A few months ago (July 2008)
another flash flood came through the ravine after a particularly hard rain.
Fortunately, the large rocks I'd put in captured the debris and allowed the
water to pass. It actually did me a favor by depositing a large amout of
material right where I needed the fill. After resetting the pipe. I'm
continuing the project. My plan is to cut a large resevoir on the uphill
side to catch debris and have a vertical entrance shaft protected by a grate
made of bars in concrete. The purpose of the resevoir is twofold. Not only
it form a nice pool that I can draw water from, It will also act as a catch
basin for debris when there is another "gulley washer".
Another significant obstacle is crossing this creek to
get the cabin to the foundation using my easement. Originally, the farmer
that owned the land just scraped a crossing down to the bedrock and would ford
the creek. Unfortunately, this is too steep to get the trailer across.
I decided to install a culvert pipe across this area. An old friend, Edgar Hauber
warned me that flash floods have come raging down the ravine in the past
and he worried that a culvert would get washed out. In fact, while I was
living in Oregon, one of these came through and cut away part of the original
ford. I filled this with rock and laid the culvert on the ground and began
building up around it with rock and fill. A few months ago (July 2008)
another flash flood came through the ravine after a particularly hard rain.
Fortunately, the large rocks I'd put in captured the debris and allowed the
water to pass. It actually did me a favor by depositing a large amout of
material right where I needed the fill. After resetting the pipe. I'm
continuing the project. My plan is to cut a large resevoir on the uphill
side to catch debris and have a vertical entrance shaft protected by a grate
made of bars in concrete. The purpose of the resevoir is twofold. Not only
it form a nice pool that I can draw water from, It will also act as a catch
basin for debris when there is another "gulley washer".